Aug 3 2012

Dynamic Sky

Topic: Dynamic Sky
Team Members: Everett and Philip
Location: Riven
Challenge: Creating a realistic sky which can change with the time of day and weather

At the time of writing this dev blog post, the project of creating a dynamic sky has been ongoing for more than ten months. We’re proud to say that now the sky is reaching its completion.

The project started with our group’s dissatisfaction with our older skies. They all had big problems which couldn’t be overlooked. For example, our oldest sky was a basic, static skybox. At that point in time, we weren’t even considering having dynamic time or weather, so it served its purpose reasonably well. Eventually though, we grew more ambitious and wanted to bring a full day/night cycle with realistic weather changes to Riven. We brought in a third-party sky shader called UniSky for last year’s Mysterium demo, but we weren’t satisfied with certain limitations it had. For example, the sky tended to use flat colors for the clouds, all the way across the sky. There was no backlighting or shading from the sun or moon. It just didn’t meet our standards.

The original static sky texture used both in Riven and later in Uru’s “Cleft” scene

So we went to work designing a new way for a sky system to operate. The original idea we had was for a static skybox to use multiple textures (cloud alpha, cloud normals, cloud edges, etc.) to change its lighting and composition with the time of day. It was then realized that simply by animating this static system with pre-rendered dynamic clouds, we could have a skybox that looked natural, was lit realistically, and could have clouds that moved as the player worked in the game.


An early test of animated clouds.


The first iteration of this idea was flawed. Our static system was based on a set of pre-rendered image textures, being brought separately into the shader. We naively extended this same system to animated clouds, without realizing that having 400 to 800 frames each for 8 texture sets would eat up a lot of storage space and system memory.

Eventually, after several revisions of this flawed system, we agreed that the texture sets needed to be overhauled to save space and be more efficient for the shader to compute. The system we decided on was to have one basic animated texture. This texture would be a grayscale animation of soft cloud formations, which could then be modified in real time to produce sharper cloud textures that could also morph on cue to cover more or less of the sky, making the transition from a clear blue sky to a gray overcast sky much smoother than in previous iterations.


A test of the very first iteration of cloudiness variation.


The whole sky architecture was also designed so that it could be controlled using very few final variables. At this stage, there are three main properties that control the sky: time of day, cloud speed, and cloudiness. That isn’t to mention the complexities that depend on time, however, such as determining the correct position of the sun and moon as well as the proper colors of different parts of the sky. Weather effects like rain have not yet been integrated, so there will likely be a fourth variable (not in the sky shader itself, but in the related systems) for raininess, to transition from a light shower to a thunderstorm. We’ll likely end up limiting any extreme weather to be quite rare and quick, so as not to interfere with puzzle solving too much.


Another early iteration, with improved lighting.


The lighting for the sky is all texture-based at this time. Most of the sun and moon’s influence on the sky is driven by simple black-to-white gradients, modified by the cloudiness of the sky and the appropriate color of the the sky, and these gradients move with the location of the sun. The cloud layer’s transparency blocks the sunlight, naturally, as well as part of the sun’s glow. When overcast, this creates a natural brightness in the sun’s half of the sky, while maintaining the flat haziness that defines a cloudy sky.

An animation showing all 27 frames of the lunar cycle.

The moon is animated as well, with 27 frames of animation representing each daily phase. The phases fade between each other to produce a cohesive lunar cycle. Moonlight, though it hasn’t yet been made dynamic, will be directly affected by the phase of the moon. A full moon will illuminate the night scenes greatly, but a new moon will leave the scenes very dark. We’ve planned ahead though, and have added night-time activated lights in certain areas to make it easy to navigate Riven and solve the puzzles even in the extreme dark.


A test of an experimental god-ray effect for the moon.


The last major change made to the sky, made during its second build in Unity, was the addition of a backlighting effect, which harshly darkens the centers of clouds which are blocking the sun, and softly darkens the centers of cloud all across the sky.


A test video demonstrating cloud backlighting.


One of the problems we ran into, writing the software behind the sky, was that we often ran out of registers (or memory slots). None of us had ever written a shader of this size before, so we were not aware of the way in which writing a shader is so different from writing most programs. The main difference is that the entire program (and all its memory) is confined to the space available in the GPU (Graphics Processing Unit, a chip on the computer specifically for doing graphics operations).

So, we had to write the shader to be unusually lightweight and efficient with the memory it used. That meant storing variables for as short a time as possible, finding the least memory-consumptive way to do certain color-mixing operations, and finding new ways to cram data into otherwise unused channels of our textures. It was more than a few times that we were informed that we had “run out of constant registers” or had “exceeded the maximum number of instruction units” and had to rework everything from a blank slate. The final sky shader ended up being 557 standard lines of code.

The final version of the sky is flexible, determining cloud size and sky colors all in real time. It could be adapted for use in Tay and The 233rd Age, for example, and changed to match those Ages’ color schemes. The sky is the product of much of the last year’s development, and we think that it’s a robust addition to Starry Expanse.


Apr 12 2012

Camera Matching

Topic: Camera Matching
Team Member: Everett
Location: Boiler Island
Challenge: Creating perfectly accurate scenes

For the first post on our brand new dev blog, I thought I’d explain the ins and outs of “camera matching”, a process we use to recreate the environments of Riven. At the time of writing this post, I’m deep in the process of camera matching for Boiler Island, which makes it a great time to feature it here.

Camera matching for our project is the process of taking the original images from Riven and using them to rebuild the scenes exactly as they were. It’s generally a process of trial and error, piecing together information little by little until a scene begins to take shape, matching the original line-for-line.

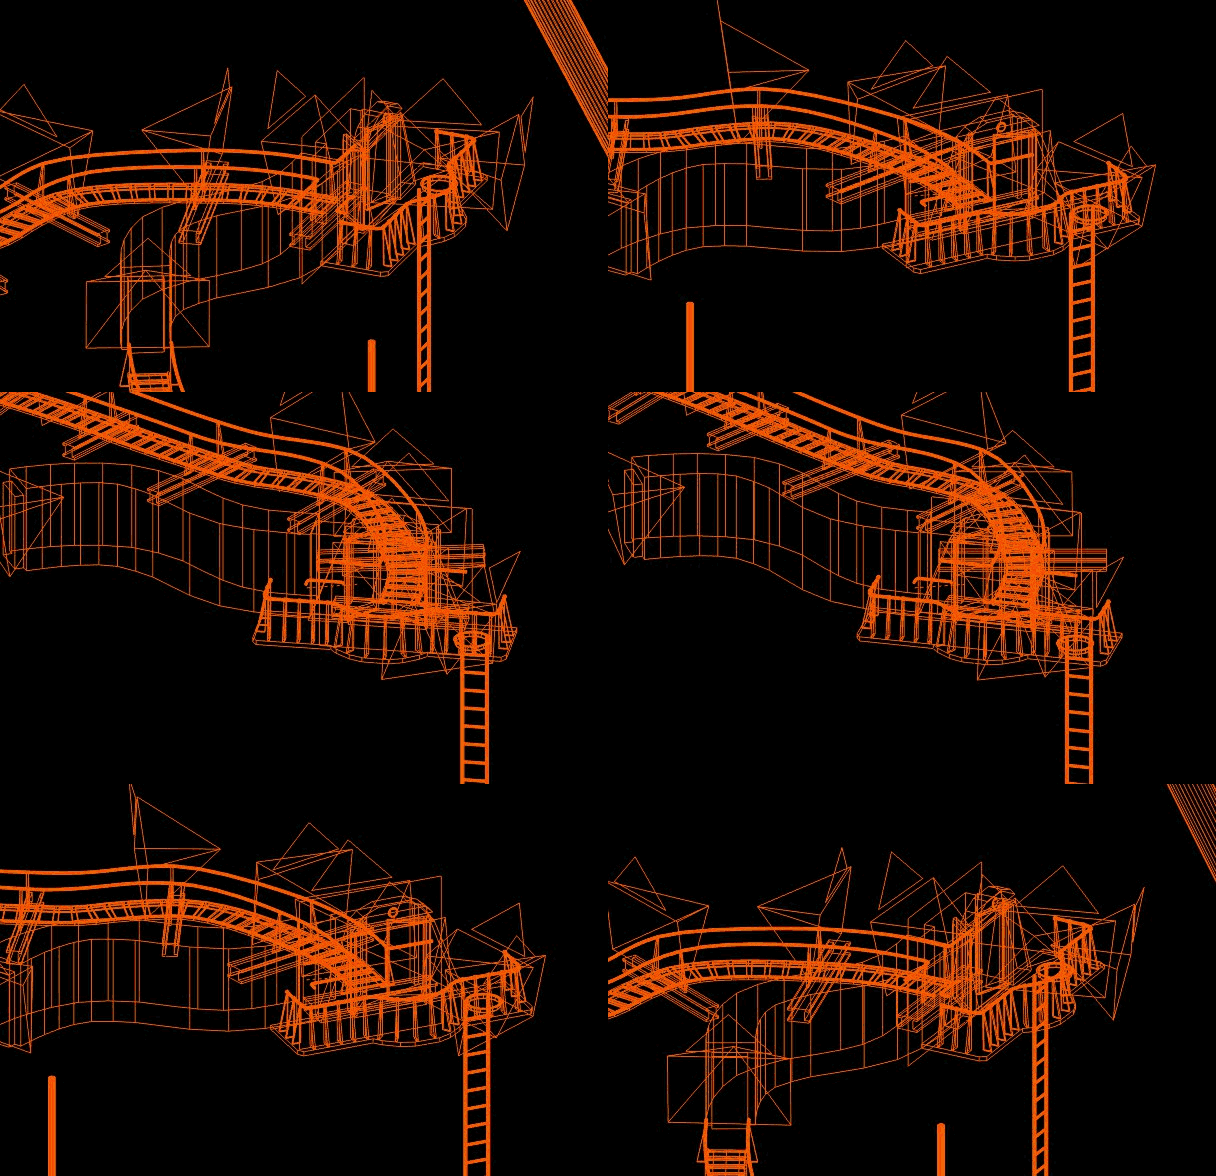
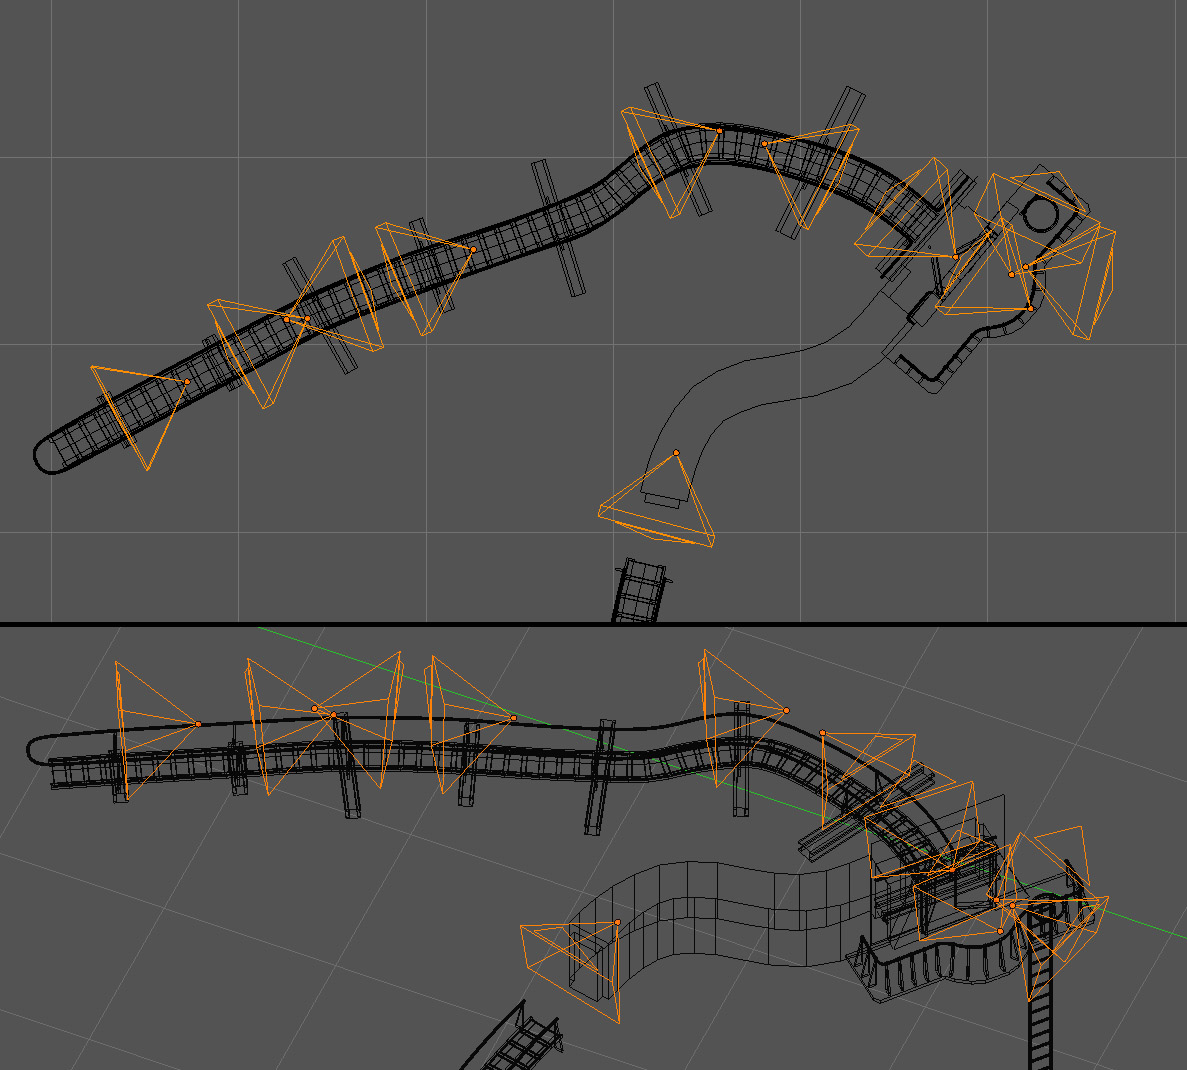
Ytram cave topology

The Ytram cave walkways and balcony are portrayed here in wireframe. The orange pyramid shapes are cameras matched to images from the original.

The first step in the camera matching for any new scene is always the same: find a predictable object to line up the first shot. You need an object which you know for certain is an exact shape, like a circle or a pentagon, on which to base the perspective and angle of the rest of the scene.

For Boiler Island, that shape was the boiler. Its perfectly cylindrical shape made it a wonderful fit to start matching with. The first shot is very important. You have to be sure that it’s nearly perfect before you move on to matching others. If not, the errors you made in matching the first image will greatly affect your ability to match later images, making the entire process much more of a fumble in the dark, constantly attempting to correct early mistakes. The boiler made the first shot much simpler, by supplying a clear visual representation of the camera’s rotation and location in respect to the shapes of the boiler.

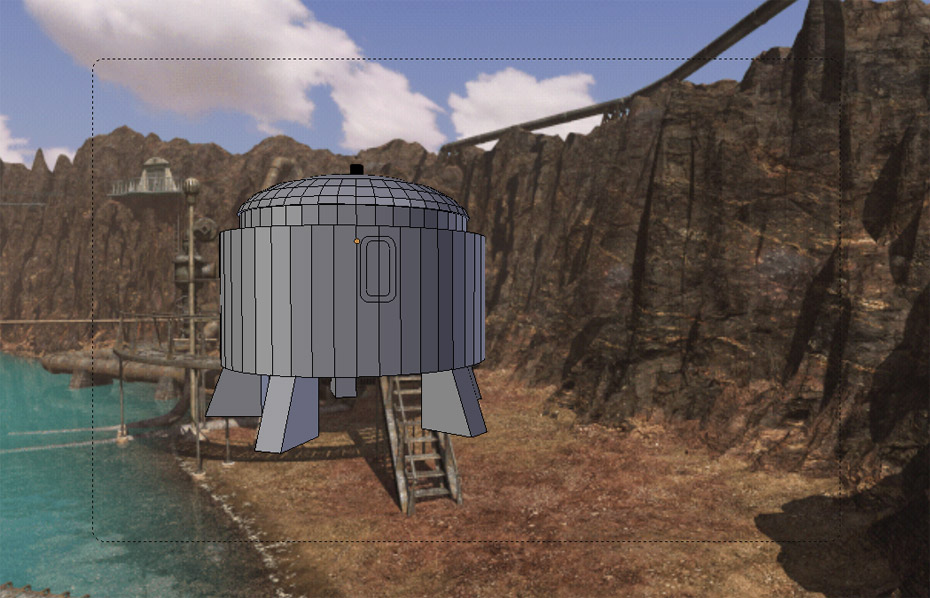
Boiler

Matching the first camera angle with a primitive shape representing the boiler.

Matching an exact camera angle is a tougher prospect than you might think. Each camera basically has 7 relevant variables: X, Y and Z location, X, Y and Z rotation, and the lens angle.

X, Y, and Z locations describe the camera’s exact point-based location in the 3D space. Figuring out the general location is usually the first step to matching a camera. Often when figuring out location, I can use parallel lines in the scene to estimate a general range. For example, in the image above, the boiler is built of circular rows of bricks. By looking at which row is completely parallel with the image itself, I can tell that the camera is probably at a height which is level with that row of bricks. Then I can lock the camera to that specific height and move onto other variables.

Lens angle is the pin that holds it all together. This variable can make or break a camera angle. Basically, lens angle describes the exact section of perspective which is seen by a camera. When you zoom using a camera, lens angle gets very narrow, showing only a tiny piece of a point’s perspective. Zooming out, on the other hand, shows a wider lens angle, framing a much larger portion of the view. Needless to say, getting this value exactly right is imperative, as it directly affects the apparent scale of objects in the camera’s view. If you can manage to estimate the lens angle with accuracy, the rest of the matching is quite simple.

Ytram Cave wireframe

A wireframe pan of the balcony and Ytram cave areas' half-completed guideline meshes.

Once the first shot is lined up reliably, the rest of the process is simply branching out from that information. Then, more cameras are lined up with the basic model. These multiple camera angles then allow more models to be added in which match all of the current camera angles.

Sometimes, angles need to be adjusted to match new models, as well. For example, on Boiler Island, I had most of the boiler area set up and matching well. Then I moved ahead to matching the balcony and cliffs, and realized that none of my camera angles were matched accurately enough for extremely distant features to line up properly. This led to me going back and realigning every camera angle I had set so far, so as to match the new details of the cliff walkways and the balcony.

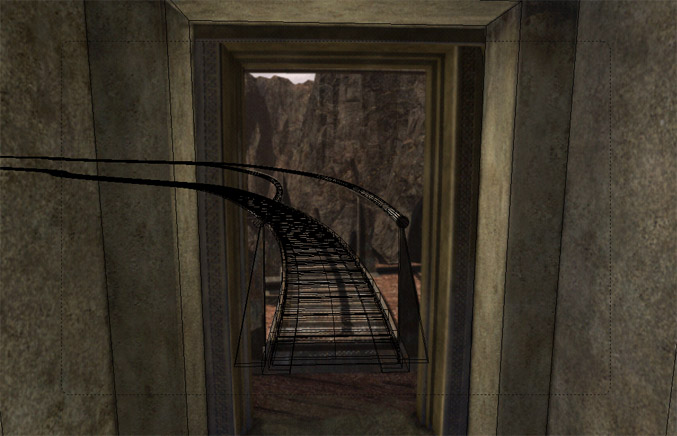
Ytram Cave walkway

The exit from the Ytram cave to the cliff walkway, matched with a wireframe of our recreation.

Of course, the process of camera matching is only a precursor to the final environment. During the course of matching camera angles with the geometry on the scene, I try to use as little detail as possible to convey the basic lengths and angles necessary to match each new camera angle. I do this both to keep the scene uncluttered, as I do much of my matching work in a wireframe view, but also because what I’m building will not be used in the final game, so dwelling on its details would be a waste of time. The models I create during the camera matching stage are simply to be used as guides when creating the final game assets. The camera matching stage is very freeform and branching, whereas the final modeling stage will likely be much more structured and organized, simply because of the detail involved.

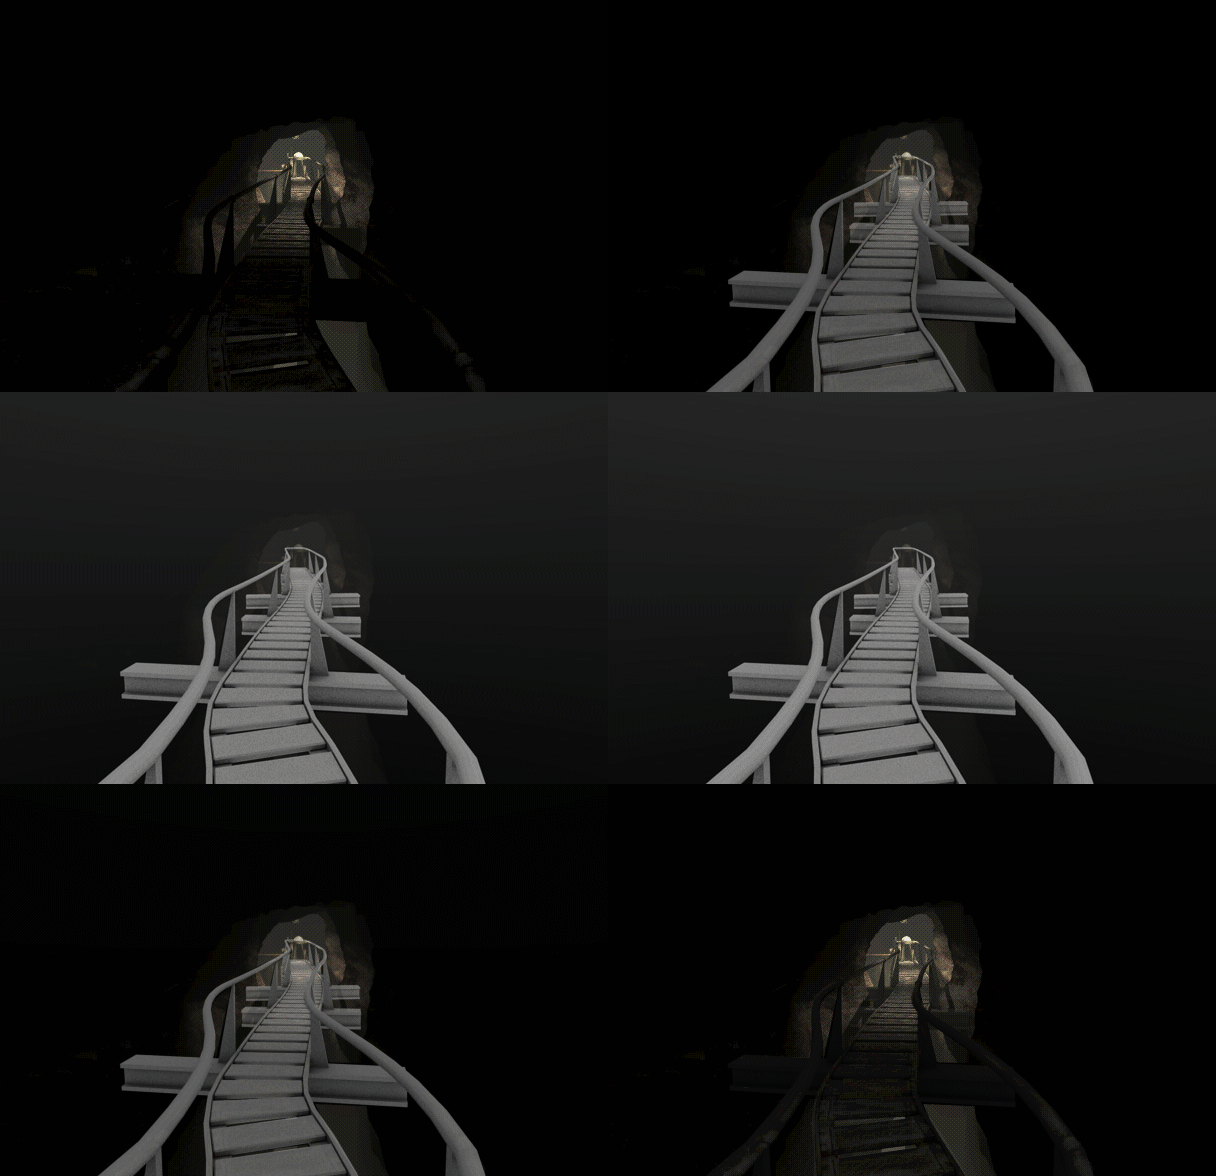
Ytram Cave with the new geometry fading in and out

The newly made Ytram cave walkway is shown here, matched with an image from the original.

The stage of camera matching is certainly where we get our most concentrated exposure to the details of Riven’s original images, exposing some of the mistakes and odd anomalies that dot the images. For example, in an image standing by the boiler’s controls, looking up towards the pump system, you can see towards the lower left of the screen the handle of the paper press, an object that was intended to be completely removed from the game before it was released. (The image’s filename is “287_bislandcrater.1590.png”, for those interested enough to look for it.)

All of this work will culminate to a set of guideline meshes which will span the island and make the final asset creation that much more accurate and streamlined. Camera matching, while tedious and time consuming on its own, stands as an integral part of the process. It allows a level of loyalty and exacting similarity to the original not available by any other means.